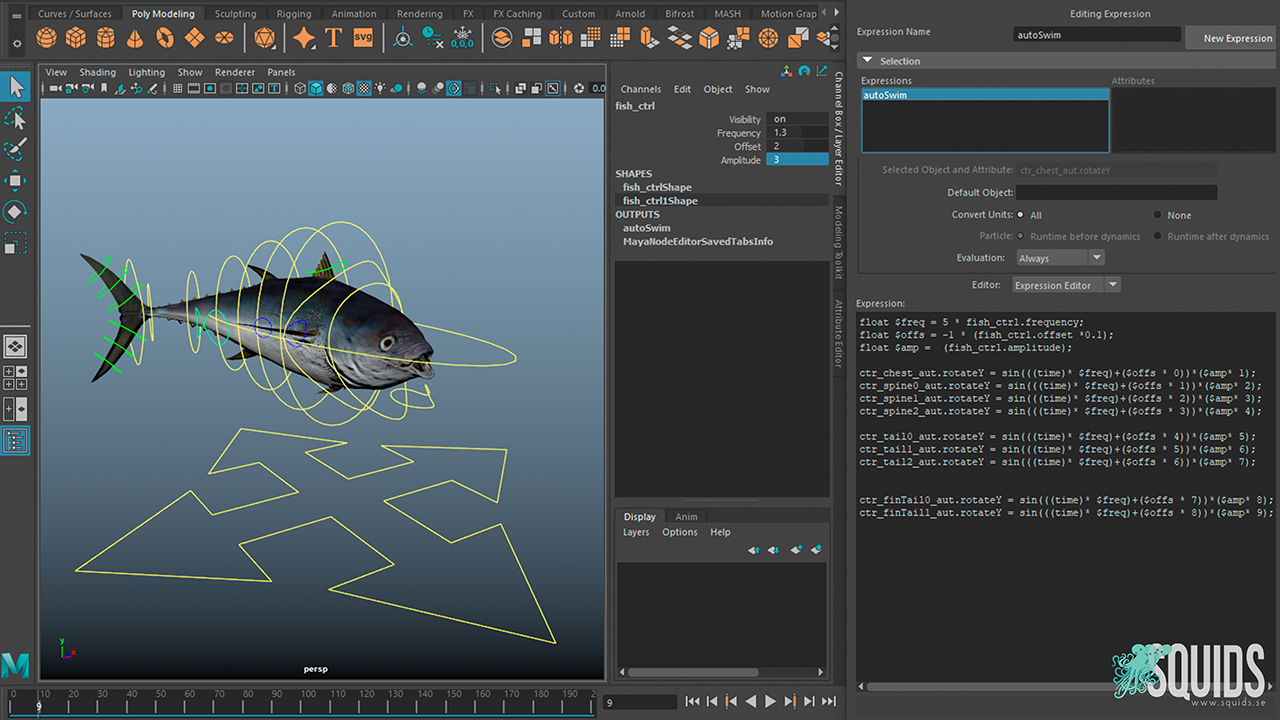
My intention was to create swim cycle animations in different ways to experiment with performance, functionality and the visual expression.
In my first test rig I tried out the traditional sine curves and clusters in Maya, but I ended up writing my own automated joint chain expression in the expression editor. This made a lot more sense to me, since it seemed like the joints got a more stable and editable motions. I added attributes - amplitude, frequency and offset - on my automated swim cycle that could be easily tweaked.
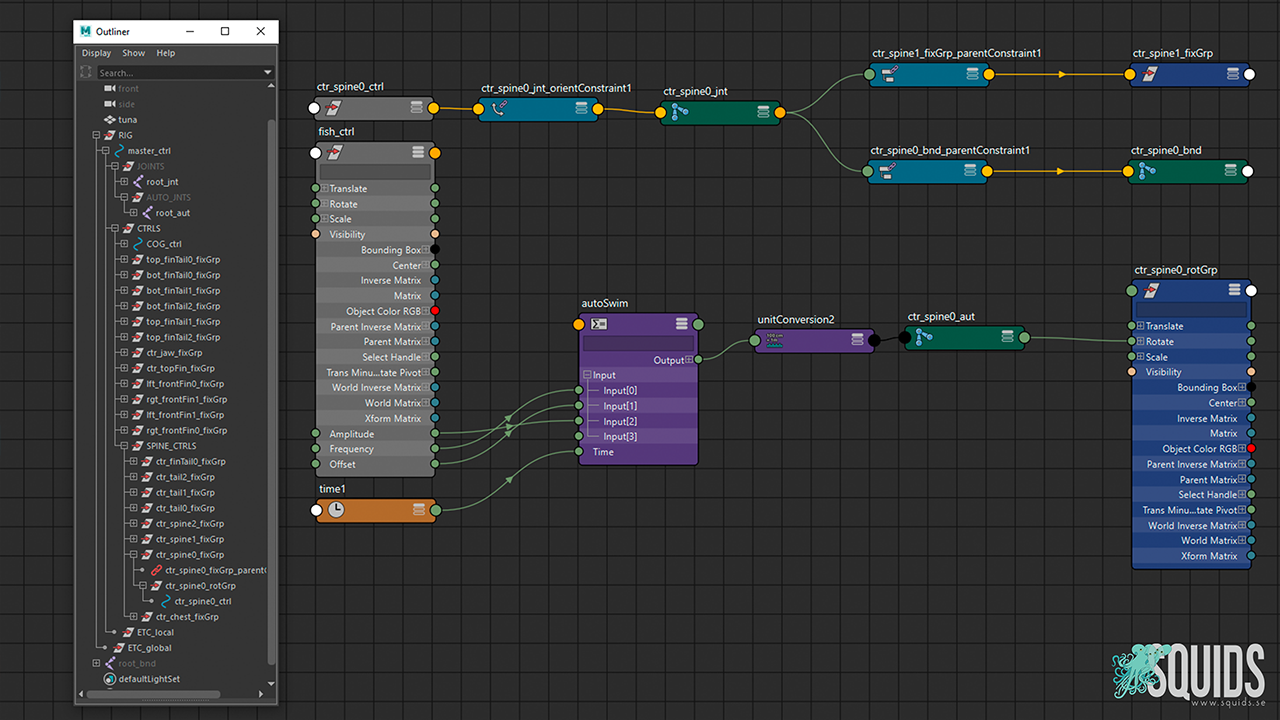
Additionally I created a separate joint chain for the automated spine that drove a rotation group, that was parented to the control's fix Group. I this way I could easily modify the automated swim cycle manually to add character to the animation.
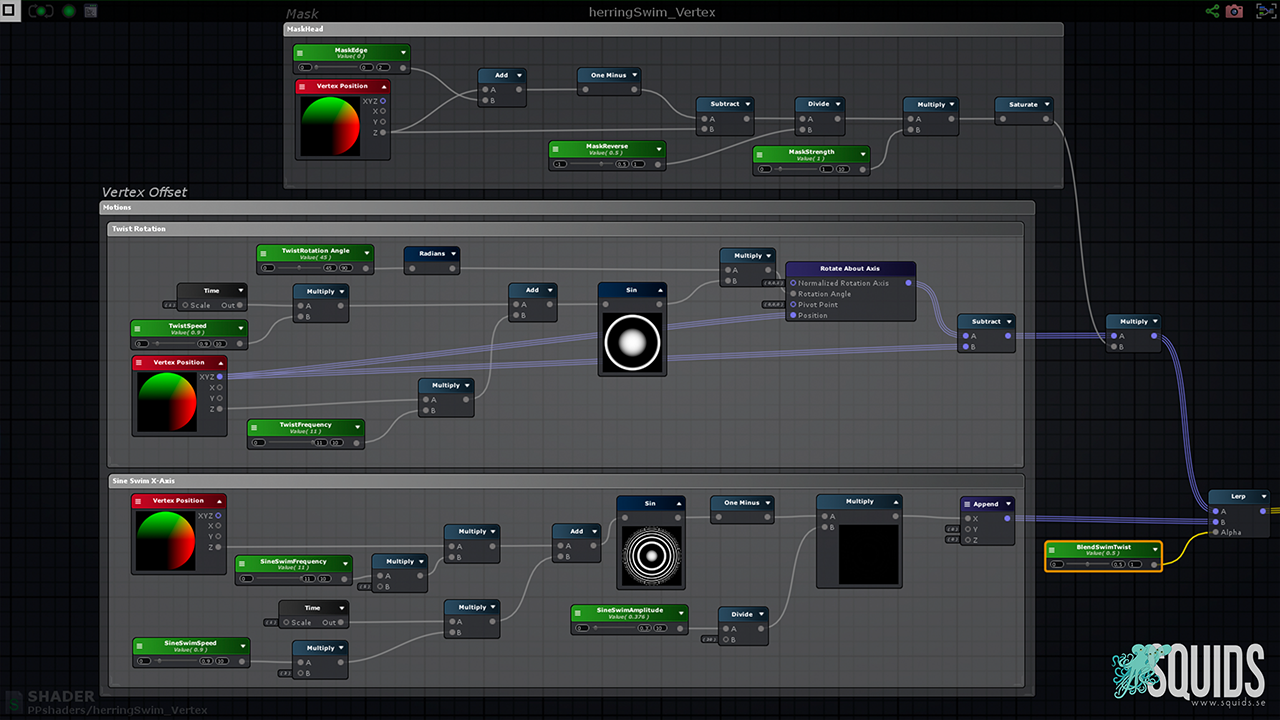
Updating rotation values for all the joints of all animations that spawn in a school of fish, requires some performance. In order to keep the performance down, I started playing around with a swim cycle, that was made up by a vertex shader. My approach was blending different vertex motions - a sine motion, a twist motion, left/right motion and finally a sine rotation around the up-axis. I then added a mask (as a property value) that would adjust how much of the mesh i wanted to be affected by the vertex motion.
Afterwards I made a few more animations to add life to the game play. The swim cycle needed to blend with turning up, down, left and right. This was made with different layers in the animator and were additively blended with float values. I set up the controls with scripting and an Eat (open mouth) motion was added with a trigger parameter. I also used an avatar mask to be able to do this only to the head and neck of the characters.
(The models and textures are made by character artist Tomaš Plasíl in Prague).